Sunday, March 17, 2013

Handmade Name Postcard

I made a handmade postcard for one of my partner's on Swap-Bot. With this one, I decided to use a method I learned in Junior High.
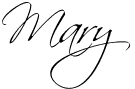
  1. Fold a piece of paper in half.
  2. Write your name in cursive on the fold.
  3. Cut your name out in bubble form without cutting on the fold unless you need to depending on the letters in your name.
  4. Open it up.
  5. Glue it to another piece of paper of a different color making sure your writing is on the glued side down.
  6. Turn your art sideways and you'll be able to see a creature or bug.
  7. (See photos below to my finished project for an example.) 

    
    Title: Betsy (Handmade Postcard)
    Date: March 14, 2013

    ***Cursive Betsy***
    
    
    Turned to the side to reveal a "Creature".
    What do ya think?! Cute, huh?
    Now you try it. :)

    Material Used:

  • Scrapbooking Paper
  • Pen & Scissors
  • Tacky Glue
  • Mod Podge
Here is a mini version:


Have a wonderful day!

Thursday, March 14, 2013

GREEN Inchies

It's been a while since I created some Inchies. Last week I created 2 GREEN Inchies for my partner on Swap-Bot. I used a method from Linda Isreal's YouTube video, "How to create a Collage ATC Using Scraps of Paper and Stamping".  That was both fun and challenging.

Supplies Used:
  • Scrapbooking Paper Scraps
  • Used Postage Stamps
  • Stamps and Ink Pads
  • Gold Glitter Glue
  • Tacky Glue
  • ModPodge

Title: GREEN Inchies
Date: March 11, 2013

Friday, March 8, 2013

Green ATC to Celebrate St. Patrick's Day

I created a Green ATC for my partner on Swap-Bot for a nice St. Patrick's Day treat for the eyes. Green background with a hint of green here and there. Gold glitter glue for seeds to represent gold for the holiday. Enjoy!

Materials Used:
  • Scrapbooking Paper and Supplies
  • Gold Glitter Glue
  • Cardboard
  • Tacky Glue
  • Mod Podge

Title: Life is Beautiful
Date: March 07, 2013


Sunday, March 3, 2013

Sunflower ATC Tutorial

Hello.... This is a tutorial I wrote on my old blog and decided to repost it for all of you.

This is how I create ATC's. This is only one version of many ways to create an ATC.

Supplies needed:
  1. White Paper (For your drawing)
  2. Pencil, Pen, Crayons, Colored Pencils, etc. (Whatever you use to create your drawing)
  3. Scrapbooking Paper
  4. Precision Scissors
  5. Paper Cutter
  6. Cardboard (Any type. I recycle and reuse by using cereal boxes)
  7. Glue (I use Tacky Glue)
  8. Gloss Medium or Mod Podge


Step 1:  Draw a Sunflower, color it, and cut it out. Use precision scissors to cut your drawing out to get the best results.


Step 2: Choose 2 backgrounds with scrapbooking papers of your choice.


Step 3: Measure and cut out the first background paper. Make sure it is less than 2.5" x 3.5", but bigger than the cutout drawing.


Step 4: Measure and cut out the second background paper. Make sure it is exactly 2.5" x 3.5". Do the same with your cardboard.


Step 5: Glue the second background paper to the cardboard. I poured the glue allover the back of the cardboard and spread it out with my finger... as seen in the photos below.


Step 6: Glue the first background paper on top of the second background paper. Then glue the cutout drawing on top of that.


Step 7: Apply the ATC with Gloss Medium & Varnish or Mod Podge to protect your work. Add about 3 coats, waiting at least 15 to 30 minutes between coates.


Step 8: Measure and cut out the backing. Make sure it is exactly 2.5" x 3.5". Then glue it to the back of your ATC. This is where you place your credit to your artwork (As seen in the photo, I cut the backing a little too small. OOPS!).


Step 9: After letting it dry for at least 15 minutes, place the ATC in a book for an hour or two, so it can dry flat. You can place wax paper in the book to protect the pages of your book.

Congratulations... You made a Sunflower ATC....


Have fun creating your ATC's and don't forget to show me your creations. Have a wonderful day!